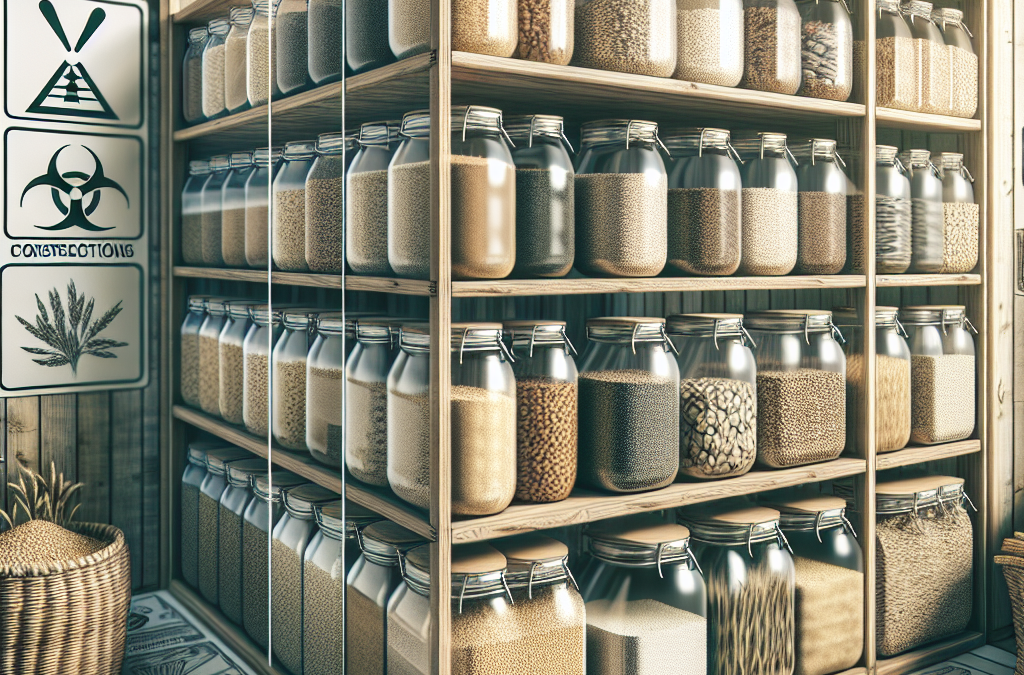
Choose the Right Storage Containers
Pick Non-Toxic Materials
When storing grains, the first rule of thumb I stick to is choosing containers made from non-toxic materials. Plastic is often a go-to for many, but not all plastics are created equal. I prefer glass or food-grade stainless steel, as these are not only durable but also don’t leach any nasty chemicals into your grains.
You might think that just throwing your grains into any old container is fine, but trust me, it’s worth investing some time finding the right one. Make sure to check for BPA-free labels if you’re sticking with plastic. Nothing ruins cooking like that plastic flavor—you know what I mean?
Also, don’t overlook the importance of airtight seals. You want to keep your grains fresh and well-protected from air and moisture. I always look for containers that screw tight or have a rubber seal. This way, I can confidently stash my grains without worrying about spoilage.
Consider the Size of Your Containers
Next, think about the size of your storage containers. You want them to be large enough to hold your grains but not so big that they take over your pantry. I usually go for a medium size that can conveniently hold about a week’s worth of grains.
Why limit yourself to a week, you ask? It’s all about keeping the grains fresh. If I store them away for too long, I run the risk of something going off, and nobody wants that. A good rule of thumb is to check the expiration dates on your grains as well, ensuring they’re still in prime condition for consumption.
Lastly, I always keep similar grains grouped together. This way, I can grab what I need without having to sift through lots of different containers. It makes me feel like I have my life together, even if I’m just making oatmeal in the morning!
Label Everything
Labeling is crucial in my grain storage habits. When you’re dealing with multiple types of grains, it’s super easy to confuse barley with wheat or quinoa with rice. Trust me; I’ve made that mistake before, and it wasn’t pretty.
I always write the name of the grain, the purchase date, and perhaps even the best-by date on my labels. This not only helps me remember what I’m working with, but it also lets me use the oldest grains first. A little organization goes a long way—plus, you can get creative with your labels, making it a fun little project!
There are fancy label-makers, but honestly, handwritten ones do the job just fine. All you need is some masking tape and a Sharpie, and you’re set! So get those containers labeled, and watch how much easier cooking becomes!
Keep Them in a Cool, Dark Place
Avoid Direct Sunlight
When it comes to storing grains, I can’t emphasize enough how important it is to keep them away from direct sunlight. Ultraviolet rays can degrade the quality of your grains and cause them to spoil faster.
I usually opt for a cupboard or pantry that doesn’t get a lot of sunlight during the day. If you’ve got a basement or a climate-controlled area, even better! Low light exposure helps keep my grains fresh for longer.
So, turn off that overhead light when you peek in for a snack. Your grains will thank you in the long run. Plus, nothing feels cooler than knowing you’re storing food like a pro.
Temperature Control
Temperature is another biggie in grain storage. Ideally, you want to keep your grains in a chill place—but not too chilly. I keep my grains around room temperature, which is around 60 to 70°F (15 to 21°C). Too warm, and they might attract pests; too cold, and it could mess with the grain’s integrity.
If you live in a warmer climate, a dedicated shelf in an air-conditioned room or a cool basement is a lifesaver for your grains. If I ever feel that a particular area is getting too hot, I make a switch or two to keep things comfortable.
Ultimately, monitoring the temperature where you store grains can help ensure durability and taste. It might seem insignificant, but those little adjustments can impact the quality of my meals down the line!
Humidity Matters
Don’t even get me started about humidity! Excess moisture can lead to mold, and that’s something I’d rather avoid. I’ve learned to keep my grain storage area dry—using silica gel packets in containers if I need to is one trick I’ve found helpful.
Get Whole Wheat Flour, Grains and Milling Supplies – CLICK HERE
In addition, I watch out for signs of moisture when I check my grains. If the container ever feels damp, I immediately move it to a more suitable location. There’s nothing worse than finding out your precious grains have gone bad because of a little moisture.
Ventilation is key, too. Whenever I store my grains, I make sure the air can flow around the containers instead of trapping humidity. Sometimes moving things around in the pantry can make all the difference!
Be Mindful of Pests
Inspect Regularly
Pests and grains are like oil and water; they just don’t mix! I make it a habit to inspect my storage every couple of weeks or so. A quick look helps catch any signs of infestation early—like little holes in bags or weird smells.
It may sound tedious, but it’s such a small effort for peace of mind. If I spot anything suspicious, I’ll toss out the affected grains and clean the container right away. Better to be safe than sorry!
Building a routine around inspecting your grains is a game-changer. Over time, it becomes second nature, and you won’t have to worry about nasty little surprises down the line.
Use Natural Repellents
When it comes to keeping pests at bay, I swear by natural repellents. Bay leaves, for instance, are a fantastic option. If I pop a couple of dried bay leaves into my grain containers, I find that they help deter unwanted guests.
Additionally, I also love using garlic powder and diatomaceous earth around the pantry. No, you don’t need to go all-out with pesticides, just some clever, old-school methods can do the trick nicely!
I promise you’ll enjoy cooking a lot more knowing that everything you have is safe, sound, and pest-free. It gives me such peace of mind, and I think you’ll appreciate it, too!
Maintain Cleanliness
Finally, cleanliness is non-negotiable in grain storage. I always make sure my pantry shelves are well-organized and regularly cleaned. Crumbs and spills can attract pests like nobody’s business. You definitely don’t want milled flour or rice leftover from a previous storage session to ruin things!
When I notice any spills, I bust out the vacuum and keep things tidy. A clean space helps me keep my grains stored away from chemicals and pesticides and minimizes the chances of infestation.
By maintaining a scrubbed-up environment, I feel more at ease when I whip up recipes. It also gives me room to thrive creatively in the kitchen, without any nagging worries about what might be lurking behind the containers.
FAQ
1. How should I clean my storage containers?
I recommend using warm soapy water and rinsing them thoroughly. Allow them to air dry completely before filling them up again. If they’re particularly dirty, soaking them can help!
2. Can I store grains in plastic bags?
It’s best to avoid long-term storage in plastic bags, as they can leach chemicals and are not airtight. Invest in better containers for a safer bet.
3. How often should I check on my stored grains?
A quick inspection every couple of weeks is ideal. It helps catch any signs of pests or spoilage early on, keeping your storage in tip-top shape.
4. What types of grains should I store at home?
You can store a wide range of grains like rice, oats, quinoa, and barley. Choose the ones you use most often and keep them easily accessible!
5. Do I need to keep grains in the fridge?
Not necessarily. Most grains can be stored at room temperature in a cool, dark place. However, if you’ve cooked grains or opened a bag, storing them in the fridge can help keep them fresh.
Get Whole Wheat Flour, Grains and Milling Supplies – CLICK HERE
Related Content
Auto Amazon Links: No products found.