
Choosing the Right Container
Types of Containers
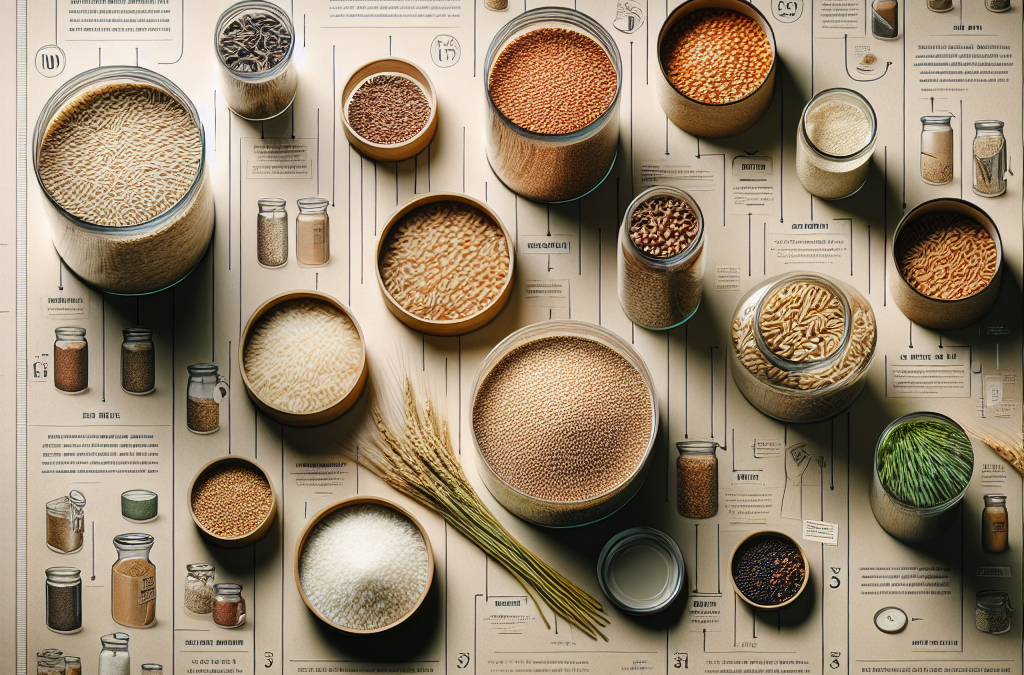
When I first started getting into grain storage, figuring out containers was a game-changer. You’ll want something that is air-tight to keep out pests and moisture. Glass jars, food-grade buckets, and even vacuum-sealed bags are all fantastic options. Each has its pros and cons, but I’ve found glass jars to be the most visually appealing and easy to label.
Don’t forget about the size! I usually opt for quart or half-gallon jars for smaller grains and larger buckets for bulk storage. It helps to have a variety of sizes so I can grab what I need without making a mess.
Lastly, make sure to avoid containers that are made with harmful plastics. The goal is to keep my grains pure and free from any weird chemicals. Always read labels and choose BPA-free options.
Sealing It Right
Even the best container won’t be any good if it doesn’t seal properly. I’ve learned that even a tiny crack or a not-so-tight lid can ruin all my efforts. Invest in high-quality lids, and if you’re using bags, make sure those seals are super tight!
There’s something satisfying about hearing that click when the lid seals, almost like a bonus reward for my hard work. I also double-check the closures by giving them a little tug before storing.
For vacuum-sealed bags, I’ve found a dedicated vacuum sealing machine to be worth the investment. It really helps prolong the freshness of my grains by minimizing air exposure, leading to that lovely taste and texture I crave.
Labeling for Effectiveness
Labeling is a simple yet crucial part of my grain storage routine. I like to write the name of the grain, the purchase date, and even the expected shelf life on each container. This helps me keep track of what I’ve got and when it’s time to use it.
If I’m feeling fancy, I’ll even include a little cooking tip or two on the label. It’s like a fun cheat sheet for future me! In my experience, knowing what I’ve got on hand allows me to plan my meals better.
I also suggest using a consistent labeling system. For instance, I stick with different colors for various grain types. This visual cue saves me time and keeps my kitchen looking neat and organized.
Understanding Storage Conditions
Temperature Control
When I first started out, I had no idea how much temperature affected grain storage. It’s super important to keep them in a cool, dark place. Room temperature works, but if you can manage it, the pantry or any noticeably cooler spot is ideal.
Heat can cause grains to spoil faster, so I try to avoid places like above the stove or anywhere that gets direct sunlight. A dedicated storage area makes it easy to monitor and maintain a consistent environment.
I also recommend considering the time of year. In the summer months, I might need to adjust where I store my grains as temperatures rise. Just listening to those little details can have a big payoff in taste and freshness!
Moisture Control
Keeping moisture at bay is another crucial factor in my grain storage routine. I always make sure to keep the lids tightly sealed, but I also use some desiccant packets in larger containers if I’m feeling fancy. They help absorb any excess humidity that might sneak in.
In addition, the location matters! Storing my grains in humid areas, like near the kitchen sink or in a damp basement, is a definite no-go. I’ve learned the hard way that moisture makes them go stale quicker than I anticipated.
If I suspect my grains might have absorbed some water, I’ll always check them for any signs of mold or an off smell. Better to catch it early than to ruin a whole batch!
Light Protection
I’m a big fan of keeping dark glass jars for my grains to minimize light exposure. Light can degrade grains over time, so I’ve found that storing them in the back of a cupboard or pantry helps. Out of sight, out of mind—and they stay fresher longer!
If you’re using clear containers, consider wrapping them in a cloth or placing them in a box to shield them from light. It’s a little extra step, but trust me, your grains will thank you.
As I’ve made these changes, I’ve genuinely noticed an improvement in my grains’ taste and texture. It’s really a small investment of time and materials that pays off big in the end!
Routine Checks and Maintenance
Regular Inspections
A little bit of prevention goes a long way in grain storage. I make it a habit to inspect my stored grains every couple of months. It helps catch any potential issues like pests or spoilage before they take over!
I usually open each container, give the grains a little sniff, and check for any visual problems. If something doesn’t smell right, I’m not shy about tossing it. It’s not worth the risk of ruining my next meal.
Plus, I like to rearrange things a bit to make sure older grains are being used first. It’s kind of like a mini workout every few months as I shift things around!
Rotating Your Stock
Similar to inspection, rotating the grains is another vital practice. I try to use up older grains first before moving to newer ones. This way, nothing gets forgotten at the back of the pantry, lost to time!
I’ve developed a simple system: whenever I buy a new grain, I place it behind the existing ones. This helps with both visibility and optimizing freshness. Sometimes even a transparent container can lead to some forgotten treasures!
If you recently bought grains in bulk, make sure you’re also labeling what you’ve purchased to keep track of freshness and usage as well. It’s actually quite fun to see how my grain collection evolves over time!
Managing Pest Control
Oh, pests—the universal enemy of grain storage. I’ve had some run-ins with weevils in the past, and trust me, it’s not a fun experience. To combat this, I always ensure my containers are sealed tightly and cleaned regularly.
When I bring new grains home, I have a habit of freezing them for a few days to kill any potential pests or eggs before transferring them to my containers. It’s a little more effort upfront, but it saves me a ton of headaches later!
I also sprinkle some bay leaves or use traps around my storage area, which work wonders. It’s amazing how effective these small measures can be in keeping my stash safe and sound!
Cooking with Stored Grains
Understanding Cooking Times
I remember the first time I cooked with stored grains, and it was a bit of a learning experience. Different grains have varying cooking times, so I’ve learned that knowing how long to soak or boil can make all the difference.
I always keep a quick reference handy or bookmark my go-to recipes. Over time, I’ve practically memorized the cooking times for each type from my stash, making meal prep smoother!
If I feel like experimenting, I’ll toss them in soups or salads, and it’s fun to see how different textures work together. Cooking with grains opens up a whole world of culinary possibilities!
Experimenting with Textures
Cooking with stored grains doesn’t have to be boring! I love playing around with different textures. For example, I often make a creamy risotto with arborio rice or a chewy barley salad. Each grain has its own unique flavor and mouthfeel, which can really elevate a dish.
I also enjoy combining different grains in one recipe. Mixing brown rice and quinoa in a hearty bowl gives it an added character while being nutritious. It’s all about balance!
Plus, I’ve started using grains in unexpected ways—like adding them to baked goods or smoothies for an extra protein punch. You really can’t go wrong when you experiment a little!
Enhancing Flavor Profiles
Grains are like blank canvases, and it’s all about how you season them. I’ve learned to keep a few essential spices and broth on hand to elevate the taste. Cooking grains in stock instead of water offers a whole new depth of flavor!
Herbs and spices are also my best friends. Just a pinch of garlic powder, rosemary, or cumin can transform a simple grain dish into something gourmet. I love sharing this secret with friends because it’s so easy yet makes such a difference.
Lastly, don’t shy away from adding veggies or proteins. Mixing in sautéed mushrooms, roasted peppers, or even chicken makes my grain-based meals truly satisfying and full of flavor.
Conclusion
Storing grains doesn’t have to be a daunting task. By following the simple steps I’ve shared, you can ensure your grains stay fresh, flavorful, and ready to elevate any meal!
FAQ
1. What type of container is best for storing grains?
The best containers for storing grains are air-tight, such as glass jars, food-grade buckets, or vacuum-sealed bags. Avoid harmful plastics to keep your grains pure.
2. How do I prevent moisture from damaging my grains?
To prevent moisture, always keep your grain containers tightly sealed, store them in a cool, dry place, and consider using desiccant packs in larger containers.
3. How often should I check my stored grains?
It’s a good idea to check your grains every couple of months. A regular inspection helps catch any potential pests or spoilage before it spreads.
4. Can I mix different types of grains in one dish?
Absolutely! Mixing different grains can add unique textures and flavors to your meals. Just keep track of their cooking times to get the best results.
5. What are some good ways to enhance the flavor of cooked grains?
To enhance the flavor of cooked grains, consider cooking them in broth instead of water, adding herbs and spices, or mixing in vegetables and proteins for a well-rounded dish.
Related Content
Auto Amazon Links: No products found.


