Hey there, fellow grain enthusiasts! If you’re anything like me, you love whipping up your tasty homemade grain mixes. But, let’s face it, one of the biggest hurdles is figuring out how to store them safely so they don’t go bad or lose their fresh flavor. I’ve learned some key tips along the way, and I’m excited to share them with you!
Choosing the Right Storage Containers
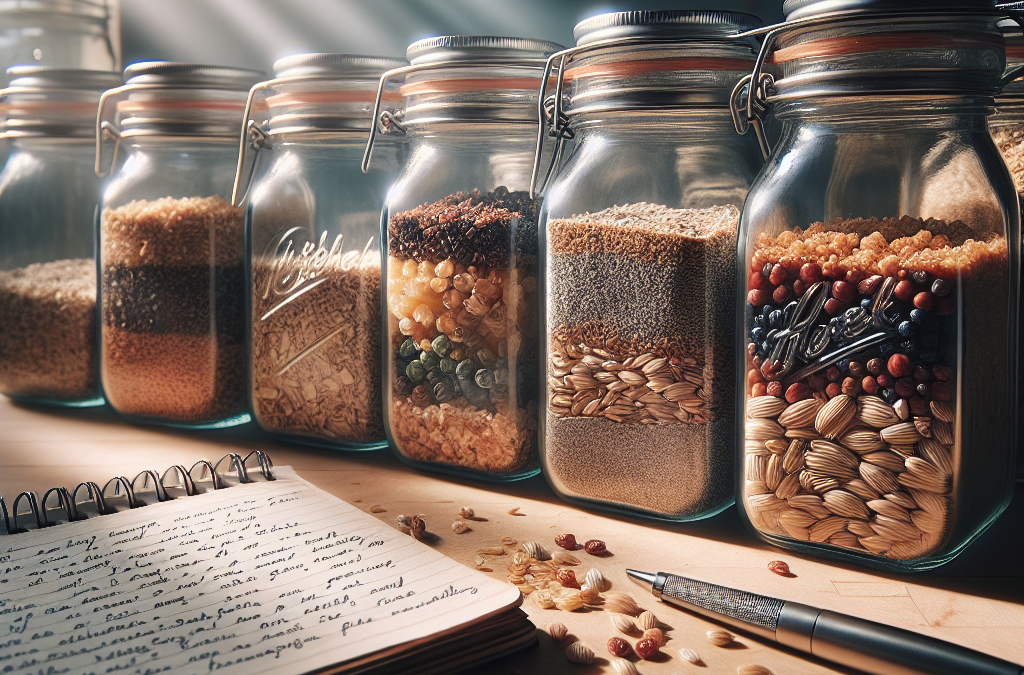
Material Matters
When it comes to picking out containers for your grain mixes, the material is super important. You’ve got options like glass, plastic, and even metal. Personally, I love glass jars because they’re non-reactive, meaning they won’t absorb flavors or odors. Plus, you can see what’s inside, which makes it easy to grab what you need.
Plastic containers can be handy too, especially with lids that seal tight. Just make sure they’re food-grade to avoid any chemical reactions. Metal containers? Well, they’re great if you want a rustic look, but you have to watch out for moisture build-up.
Ultimately, I’d say wooden containers aren’t ideal for grains because they can harbor moisture and pests. Go for something that’s easy to clean and won’t affect the quality of your mixes.
Size and Shape
The size and shape of your storage containers really depend on how much grain you typically mix up. If you’re like me and you make big batches, a larger container might work best. But if you like to switch it up with different mixes, smaller jars or containers might be the way to go. You can label each one for quick access.
Also, consider the shape—wide-mouth jars are fantastic for scooping out that delicious grain without spilling everywhere, trust me! This saves you precious time and cleanup effort.
A helpful tip: If you have leftover grains or mixes, store them separately to keep flavors distinct and avoid blending those tastes unintentionally. This way, you can still enjoy each mix’s unique flavor.
Sealing Techniques
Keeping air and moisture away is key to a long-lasting grain mix. I always double-check that my containers are airtight. Those snap-tight lids really do the trick! If you’re using jars with metal lids, a little extra rubber seal can provide an added layer of protection against air seepage.
If you’re really serious, consider vacuum-sealing your grains. It sounds fancy, but can make a huge difference in freshness. I use a vacuum sealer every now and then, and it’s so worth it!
Lastly, don’t forget about labeling your containers! A quick label helps you keep track of when you made it and what’s inside. It’s a simple yet effective way to avoid any mix-ups.
Optimal Storage Conditions
Temperature Control
Storing your grain mixes at the right temperature is crucial. Ideally, you want to keep them in a cool, dark place, away from sunlight. My pantry has become a safe haven for my mixes! Sunlight can degrade the nutrients and flavors over time, so consider putting them in a cupboard or a pantry.
Avoid storing them near heat sources like the oven or dishwasher. The fluctuating temperatures can affect the quality of your grains. Keeping everything consistent will go a long way in prolonging their life.
If you live in a particularly warm area, a small dedicated fridge could be a game-changer. I’ve even started moving some mixes there during the particularly hot months. It’s a bit of an investment but worth it for quality grains!
Humidity Control
Humidity can be the enemy of grain storage. I try to maintain low humidity levels, as they can cause grains to clump and lead to spoilage. If you live in a humid area, silica gel packets can be helpful in absorbing moisture inside your containers. Just be sure they don’t touch your food, of course!
Keeping the grains dry goes hand-in-hand with choosing the right containers. A quick tip I learned is to add a few grains of uncooked rice in the bottom of your container to naturally absorb moisture. I’m always looking for simple hacks!
Also, remember to check your stored grains regularly. A quick visual inspection can help you catch any moisture issues before they worsen. And trust me, prevention is better than dealing with moldy grains!
Light Exposure
Light can also lead to the degradation of grains, particularly their nutrients. As I mentioned earlier, darkness is your best friend here, so aim to keep your mixes in opaque or dark-colored containers whenever possible. This prevents light from reaching the grains and helps maintain their quality.
If you have transparent containers, storage in a dark drawer or cupboard can do the trick. Keeping them out of direct sunlight and fluorescent lights can save your grain mixes from losing their nutritional value.
Also, keep in mind that frequent opening of storage containers can let light in too, so try to grab all you need in one go. It makes a world of difference in keeping everything fresh!
Labeling and Organizing Your Grains
Essential Information
Let’s talk labeling! It might seem trivial, but when you’re knee-deep in a baking project, the last thing you want is to guess what’s in your containers. I like to include the grain name, date of mixing, and even the specific recipe I used. This way, I always know what I’ve got and when I made it.
Color-coded labels can be a fun way to organize too! I have a few friends who use different colors to differentiate between gluten and gluten-free grains. Whatever works for you, just make it easy to read at a glance.
Get Whole Wheat Flour, Grains and Milling Supplies – CLICK HERE
Another pro tip—don’t forget the expiration date if you’re mixing grains that have shelf lives. You might be surprised at how quickly you can loose track of time when you’re busy cooking and baking!
Organizational Strategies
Along with labeling, having a solid organizational system is super beneficial. I arrange my grains by type and usage frequency. Like, the ones I use most often are front and center, while the less-used ones are tucked away in the back. It saves me a ton of time when I’m trying to whip up a recipe!
Consider using clear bins or containers that stack well. Not only does it maximize space, but it also makes it easier to see what you’ve got. I’m all about a tidy pantry—it sparks joy for me even when I’m just grabbing a scoop of oats!
Every now and then, I’ll do a pantry refresh. This includes decluttering any mixes that have expired or that I realistically wouldn’t use. It’s a great excuse to try out some new recipes!
Regular Maintenance
Just like with any other part of the kitchen, maintaining your grain storage is crucial. I’ve learned the hard way that it’s easy to forget what’s in the back of the pantry. Setting a reminder to check your inventories occasionally can keep everything fresh and usable.
When checking your grains, give them a sniff test! Seriously, if something smells off, toss it. You really don’t want to ruin your culinary efforts with spoiled grains.
Also, remember to rotate your stock. Use older grains first before the newer ones. This simple practice helps to minimize waste and can save you some dough in the long run!
Common Mistakes to Avoid
Overpacking Containers
One little mistake I’ve made in the past is overpacking my containers. I thought cramming as many grains as possible in would save space, but it only made things messy and difficult to access. Leaving a bit of space allows for some airflow, which helps keep humidity levels in check.
Plus, overpacking makes scooping out grains a hassle. It’s so much easier to grab what you need when everything is packed correctly. Don’t make it harder on yourself!
I now use the “1/4 rule”—don’t fill containers all the way to the brim. Keep that quarter free for easy fetching and good airflow. Trust me, it’s a game changer!
Ignoring Pests
Pests can ruin your grain storage game faster than you can say “mice.” I once had a tiny weevil invasion that freaked me out! Keeping a close eye on your grains is key. Make sure your containers are pest-proof, and check for any signs of unwanted visitors regularly.
If you’re using a pantry, consider placing bay leaves inside the containers. Not only does it add a little flavor if any bugs decide to climb in, but bay leaves also repel pests naturally. Who knew something as simple as a leaf could help?
And if you do find any pest issues, deal with them immediately. Clean the area and ensure you’re using quality containers. Don’t wait—you want your grain mixes safe and sound!
Neglecting to Research
Finally, don’t skip the research! I’ve encountered all sorts of different grains with different storage needs. I recommend checking the best practices for each grain you’re working with. Some grains are sensitive and require specific temperatures and storage conditions. Ignoring these details can lead to spoilage.
Getting acquainted with the storage requirements allows you to create a tailored system for your grains. I enjoy diving into this stuff and learning something new each time. A bit of research makes the whole process smoother and more enjoyable!
So there you have it, all my tips on safely storing your homemade grain mixes. I hope these lessons from my own experiences help you to keep your grains fresh and flavorful for longer!
Frequently Asked Questions
1. How long can I store homemade grain mixes?
Generally, most homemade grain mixes can last anywhere from several months to a year depending on the grains you use. Always check for freshness and look out for any signs of spoilage.
2. What’s the best way to seal containers for grains?
The best way is to use airtight containers with proper seals. Vacuum-sealing is also a great option if you’re really looking to prolong freshness!
3. Can I use any container for storing grains?
Not really! You should avoid using containers that aren’t food-grade. Glass and high-quality plastic bins are generally your best bets for optimal storage.
4. What types of grain storage are best during humid weather?
In humid conditions, airtight glass jars, vacuum-sealed bags, or containers with silica gel packets inside are ideal to keep moisture at bay!
5. How do I know if my grains have spoiled?
Perform a quick sniff and visual test. If they smell off or show signs like mold or bugs, it’s best to toss them to avoid ruining your recipes.
Get Whole Wheat Flour, Grains and Milling Supplies – CLICK HERE
Related Content
- The Ultimate Guide to 10 Effective Wheat Storage at Room Temperature Strategies for 2025
- The Ultimate Guide to Storing Grains at Home
- 10 Effective Homemade Grain Storage Systems to Save Costs in 2025
- The Effect of Grain Storage on Cooking and Baking Quality
- Essential Oils and Grain Storage: What You Need to Know
Auto Amazon Links: No products found.