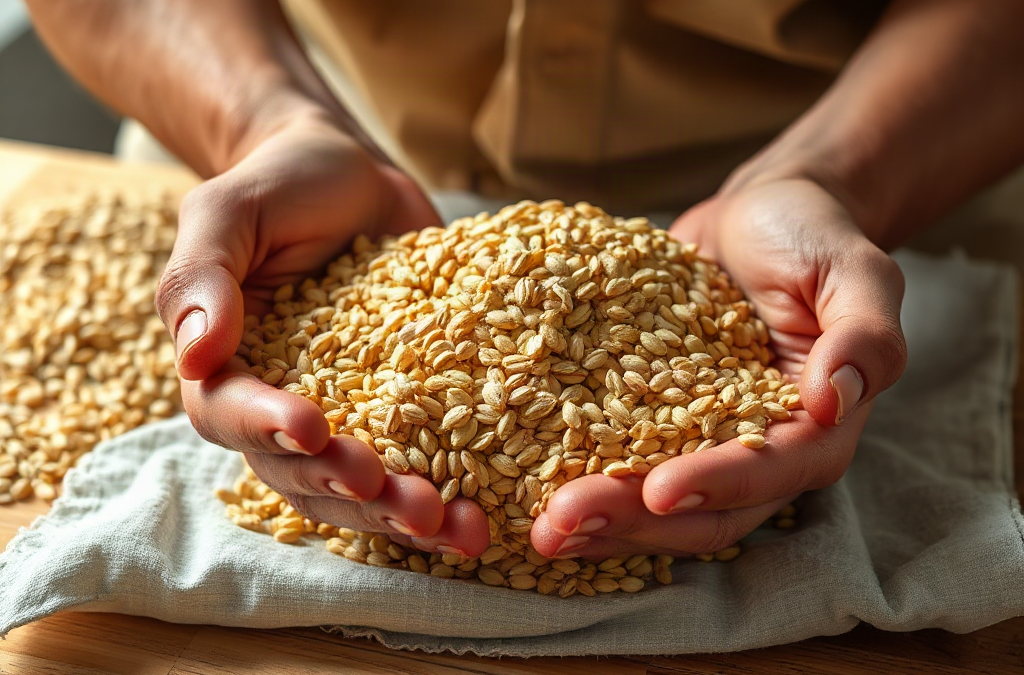
Inspect grain before sealing it by spreading a representative sample under bright light, checking kernel condition, smelling for mustiness or rancidity, screening for insects and debris, and confirming that the grain is sufficiently dry for its intended storage period. Examine material from the top, middle, and bottom of the lot because surface grain may not reveal damp pockets or pest activity deeper inside. Reject or isolate grain with mold, webbing, live insects, clumping, condensation, unusual heat, or persistent off-odors. Do not assume oxygen absorbers or airtight packaging will correct poor grain; sealing traps existing moisture and contamination with the food.
Prepare a Representative Grain Sample
A useful inspection begins with grain collected from several parts of the container or lot. Scooping only from the top can miss damp kernels, insect pockets, fine debris, or damaged grain that settled during transport. If the grain is in a sack, bucket, tote, or other manageable container, take small portions from the upper, middle, and lower areas. Combine them in a clean tray so the sample reflects the entire batch rather than its cleanest visible layer.
Sampling becomes more important as the quantity increases. A clear jar containing a few pounds of rice can be examined nearly in full, while a large bag of wheat requires deliberate probing. If access to the lower portion is difficult, transfer the grain between clean containers and inspect it as it flows. The movement exposes hidden clumps and often makes small insects easier to see. Work over a pale tray, baking sheet, or clean cloth so dark beetles, larvae, hull fragments, and discolored kernels stand out.
Keep the inspection area dry and separate from grain that has already passed inspection. A scoop carrying flour dust, insect eggs, or moisture from an older container can contaminate a sound lot. Clean equipment does not need to be elaborate: a dry scoop, shallow tray, fine sieve, flashlight, and several small sample cups are usually enough. Avoid inspecting immediately beside open storage containers, where a disturbed insect can migrate into food that was previously unaffected.
Allow recently delivered grain to reach room conditions before making a final judgment if it arrived unusually cold or hot. Temperature differences can create temporary condensation on a container, but visible moisture inside the grain still requires investigation. Do not interpret condensation as harmless merely because the delivery traveled through changing weather. Open the package in a dry place, spread a sample, and determine whether the kernels themselves feel damp or have begun sticking together.
A common failure is treating a sealed retail sack as proof of storage readiness. Packaging can hide punctures, damp seams, pest entry, or quality problems that developed before purchase. The method described in How to inspect grain before sealing it applies even when the grain looks commercially clean through a small viewing window. The final storage container should remain open and empty until the representative sample passes the physical checks.
Check Appearance, Odor, and Kernel Condition
Sound dry grain should have a reasonably consistent appearance for its type, without unexplained wet patches, extensive breakage, fuzzy growth, or greasy-looking residue. Natural variation is expected: whole wheat may include kernels of slightly different shades, and brown rice will not be perfectly uniform. The concern is a marked departure from the rest of the batch, especially when discoloration appears with clumping, odor, softness, or surface growth.
Roll several kernels between your fingers and compare them with known-good grain of the same kind when possible. Wheat berries and dry corn should feel firm rather than soft or pliable. Rice should be loose and dry, although broken pieces may be present depending on grade and handling. Oats deserve particular attention because their fat content makes stale, paint-like, or bitter odors more consequential than a simple difference in color. Smell the bulk grain and then crush a few kernels in a clean cup; damage inside a kernel may be easier to detect after crushing.
Fresh grain generally smells mild, dry, and characteristic of the crop. Musty, basement-like, sour, fermented, smoky, chemical, or rancid odors are warning signs. Packaging can contribute a temporary paper or plastic smell, so move a sample into a clean glass or stainless-steel container and smell it again after brief exposure to fresh air. If an objectionable odor remains in the grain, sealing it will not remove the underlying problem.
Inspect broken kernels in context rather than rejecting a lot for a few pieces. Moderate mechanical damage may shorten storage quality because exposed interiors are more accessible to moisture, oxidation, and insects, but a small number of broken kernels can be screened out. A large proportion of fines, floury dust, split kernels, or shriveled pieces calls for closer examination. Dust may result from rough handling, but it can also accompany active insect feeding.
Do not taste grain that smells moldy, shows visible growth, or may have contacted chemicals or pests. Cooking is not a reliable way to reverse unknown contamination, and appearance alone cannot establish that questionable grain is safe. When discoloration is subtle and the lot is valuable, comparison with a fresh reference sample or evaluation through a local agricultural extension, grain laboratory, or other qualified service is more defensible than relying on taste.
Look for Insects, Mold, and Foreign Material
Pest inspection requires both still observation and disturbance. Leave a thin layer of grain undisturbed under bright light for a minute, watching for movement, and then stir it slowly. Adult beetles may freeze when exposed, while larvae and mites can be difficult to notice against pale kernels. A fine sieve can separate powder, cast skins, webbing, droppings, and small insects from intact grain.
Examine container seams, folds, closures, and the area beneath the original package. Pinholes, silk-like strands, larvae attached near seams, or fine material leaking from a bag can indicate infestation. Some stored-product insects develop inside kernels, so the absence of visible adults is not absolute proof that no eggs or larvae are present. Kernels with neat round exit holes, hollow interiors, or unusual lightness deserve removal and may indicate a broader problem in the lot.
Mold is more than a cosmetic issue. Look for fuzzy or powdery growth, localized darkening, kernels stuck into firm masses, and damp material around the container wall. Field staining and natural color differences can resemble spoilage, but mold concerns become stronger when discoloration coincides with a musty odor, warming, moisture, or soft kernels. Do not brush visible growth away and place the remaining grain into long-term packaging; the visible patch may not represent the full affected area.
Foreign material also changes the decision. Stones, stems, husks, and occasional weed seeds may be removable by screening or hand sorting, provided the grain otherwise appears clean and dry. Rodent droppings, urine odor, gnawed packaging, bird contamination, broken glass, fuel odors, or unknown chemical residue are different. Those findings raise sanitation or safety concerns that ordinary rinsing and cooking should not be assumed to resolve.
If insects are found, separate the lot from the storage room before opening other food. Place it in a secure secondary container and inspect nearby packages, shelf joints, and spilled grain. Freezing is sometimes used to control insects in otherwise sound grain, but it does not repair mold damage, remove waste, or make contaminated grain suitable for storage. Grain brought back from cold treatment must not be sealed while condensation is present. For a complete inspection record, note the pest evidence alongside the checks in How to inspect grain before sealing it.
Evaluate Moisture Before Airtight Packaging
Moisture is the condition most likely to turn airtight packaging into a liability. Grain that is too damp can support mold, heating, quality loss, or microbial activity even when the container excludes new insects. Oxygen absorbers are intended for appropriately dry foods; they are not drying agents and should never be used to compensate for uncertain moisture.
Begin with physical clues. Dry grain should pour freely and should not leave dampness on the hand or container. Clumps, kernels adhering to the wall, condensation, a cool-damp feel, or localized warmth all justify stopping the packing process. These observations can identify obvious trouble, but they cannot provide a dependable moisture percentage. A batch may feel dry while still being unsuitable for extended storage.
Get Whole Wheat Flour, Grains and Milling Supplies – CLICK HERE 
A calibrated grain moisture meter is the stronger choice when sealing a large quantity, storing a harvest, or keeping grain for a long period. The meter must be suitable for the specific crop, and the sample should be tested according to the device instructions. Grain type, temperature, kernel density, and calibration affect readings. Test more than one sample and investigate inconsistent results rather than averaging a wet pocket into an apparently acceptable number.
Home tests based on biting kernels, shaking grain with salt, or judging sound are rough observations, not substitutes for measurement. They may distinguish obviously damp grain from very dry grain, but they cannot establish a safe storage threshold. Appropriate moisture targets vary by crop, storage duration, temperature, and storage method. Advice intended for bulk farm bins may not transfer directly to small household packages, yet both situations share the same rule: uncertain grain should not be enclosed in a low-oxygen environment.
If drying is necessary, use a food-appropriate method that exposes the grain evenly without scorching it, then let it cool completely in a clean, dry setting. Warm grain can produce condensation after sealing even if it was adequately dried. Retest or re-examine several portions after cooling. Sealing a warm center beneath a cool outer layer is a common way to trap moisture that was not visible during the first inspection.
Decide Whether to Seal, Isolate, or Reject the Grain
The final decision should reflect the most serious finding, not the average appearance of the lot. Clean-looking kernels do not cancel a persistent musty odor, and a dry top layer does not offset wet clumps from the bottom. Separate the outcomes into three categories: ready to package, temporarily isolated for further evaluation, and unsuitable for the intended food storage use.
Grain is generally ready for sealing when representative samples are dry, cool, free-flowing, normally colored, and free from objectionable odor, visible pests, webbing, mold, and significant contamination. Screen removable field debris before packing. Use clean, dry food-grade packaging, and label it with the grain type and packing date so future inspections have a clear reference point.
Isolation is appropriate when the cause is unresolved but not clearly disqualifying. Examples include a few insects in otherwise dry grain, an uncertain moisture reading, a packaging odor that may dissipate, or more broken kernels than expected. Keep that lot physically separated while checking additional samples or seeking crop-specific advice. Do not mix questionable grain with a sound supply; blending makes the entire quantity harder to evaluate and can spread pests.
Reject the batch for long-term food storage when it has visible mold, repeated damp clumps, persistent sour or musty odor, unexplained heating, rodent contamination, chemical taint, or extensive insect damage. Removing the worst handful does not establish that the remainder is unaffected. Disposal decisions may depend on the contaminant and local requirements, particularly for chemically exposed or heavily spoiled material.
Use this compact pre-sealing sequence before closing the container:
- Sample: collect grain from multiple depths and locations.
- Observe: compare color, firmness, breakage, dust, and flow.
- Smell: check whole and crushed kernels for musty, sour, or rancid notes.
- Screen: look for insects, webbing, holes, growth, and foreign material.
- Verify dryness: investigate clumps or condensation and measure moisture when the storage stakes justify it.
- Choose: seal only a lot that passes; otherwise isolate or reject it.
After sealing, retain the inspection date and any moisture readings with the storage record. Recheck containers during the early storage period for swelling, condensation, leakage, pest activity, or odor around the closure. Passing the initial examination reduces avoidable risk, but it does not replace periodic observation when packaging can be punctured or storage temperatures fluctuate.
Frequently Asked Questions
Should grain be washed before it is sealed for storage?
No. Washing adds moisture and can make grain unsuitable for airtight storage unless it is subsequently dried thoroughly with a controlled, food-safe process. Clean dry grain by screening or winnowing instead.
Can oxygen absorbers make slightly damp grain safe to store?
No. Oxygen absorbers reduce oxygen but do not remove moisture. Using them with damp grain can create unsafe or destructive storage conditions, so dryness must be verified first.
What does insect-damaged grain look like?
Possible signs include round exit holes, hollow kernels, floury dust, webbing, cast skins, larvae, adult beetles, and excessive broken material. Inspect several depths because activity may be localized.
Is a musty smell enough reason not to seal grain?
Yes. A persistent musty odor can indicate moisture or fungal activity even when growth is not visible. Isolate the lot and investigate rather than enclosing it for long-term storage.
How large should an inspection sample be?
There is no single household sample size that suits every lot. Take enough small portions from the top, middle, bottom, edges, and center to represent the whole quantity; larger or uneven lots require more sampling points.
Conclusion
Good packaging preserves the condition grain already has; it cannot correct excess moisture, hidden spoilage, or contamination. Build the decision around representative sampling, bright-light examination, odor, kernel firmness, pest evidence, and a reliable moisture assessment when storing substantial quantities. Treat clumps, condensation, unusual warmth, persistent off-odors, mold, webbing, and rodent evidence as reasons to stop rather than problems to conceal inside a container.
Keep questionable lots separate while you collect another sample, measure moisture, or obtain crop-specific guidance. Once the grain passes, pack it only in clean, dry food-grade materials, record the date, and inspect the sealed package periodically. That disciplined pause before sealing protects the uncontaminated supply and makes later storage problems easier to trace.
Get Whole Wheat Flour, Grains and Milling Supplies – CLICK HERE
Related Content
- Emergency Supply Room Setup: Essential Items and Best Practices for Preparedness
- Impact of Whole Grains on Digestive Health
- How to Manage Grain Inventory for Preparedness: Effective Strategies and Common Mistakes
- Emergency Supply of Grains: Essential Foods and Storage Strategies for Preparedness
- Maximizing Shelf Life: Innovative Techniques for Storing Grains at Home
Auto Amazon Links: No products found.